APJ ABDUL KALAM TECHNOLOGICAL UNIVERSITY Previous Years Question Paper & Answer
Semester : S1 and S2
Subject : ENGINEERING GRAPHICS
Year : 2018
Term : DECEMBER
Branch : MECHANICAL ENGINEERING
Scheme : 2015 Full Time
Course Code : BE 110
Page:1
Cc R1904
१९ مو کے
लम्बी
5 ٹا
Reg No.: Name: 11101011
APJ ABDUL KALAM TECHNOLOGICAL UNIVERSITY
FIRST SEMESTER B.TECH DEGREE EXAMINATION, DECEMBER 2018
Course Code: BE110 ∙
Course Name: ENGINEERING GRAPHICS
Max. Marks: 50 Duration: 3 Hours
PARTA .
Answer any two questions, each carries 10 marks. Marks
1 A line AB has its point A in HP and 30 mm in front of VP. Point B in VP and
60mm above HP. The distance between end projectors are 70 mm. Draw the (10)
projections and find true length of line and inclinations with HP and VP.
2 The point A of a line is 40 mm above HP and 20 mm in front of VP. The point
B is 30 mm below HP and 50 mm behind VP. The distance between end (10)
projectors is 100 mm. Find the true length of the line and its inclination with
HP and VP.
3 A pentagonal prism of base edge 30 mm and height 70 mm is resting on HP on
its base edge such that the rectangular face containing that edge is inclined 45° (10)
to HP and the base edge on which it is resting is inclined 30° to VP
PART B
Answer any three questions, each carries 10 marks.
4 Draw the isometric view of a right regular hexagonal prism of side of base
30mm and height 70mm resting on its base on HP , having a through circular (10)
hole of diameter 30mm drilled centrally through it along the axis.
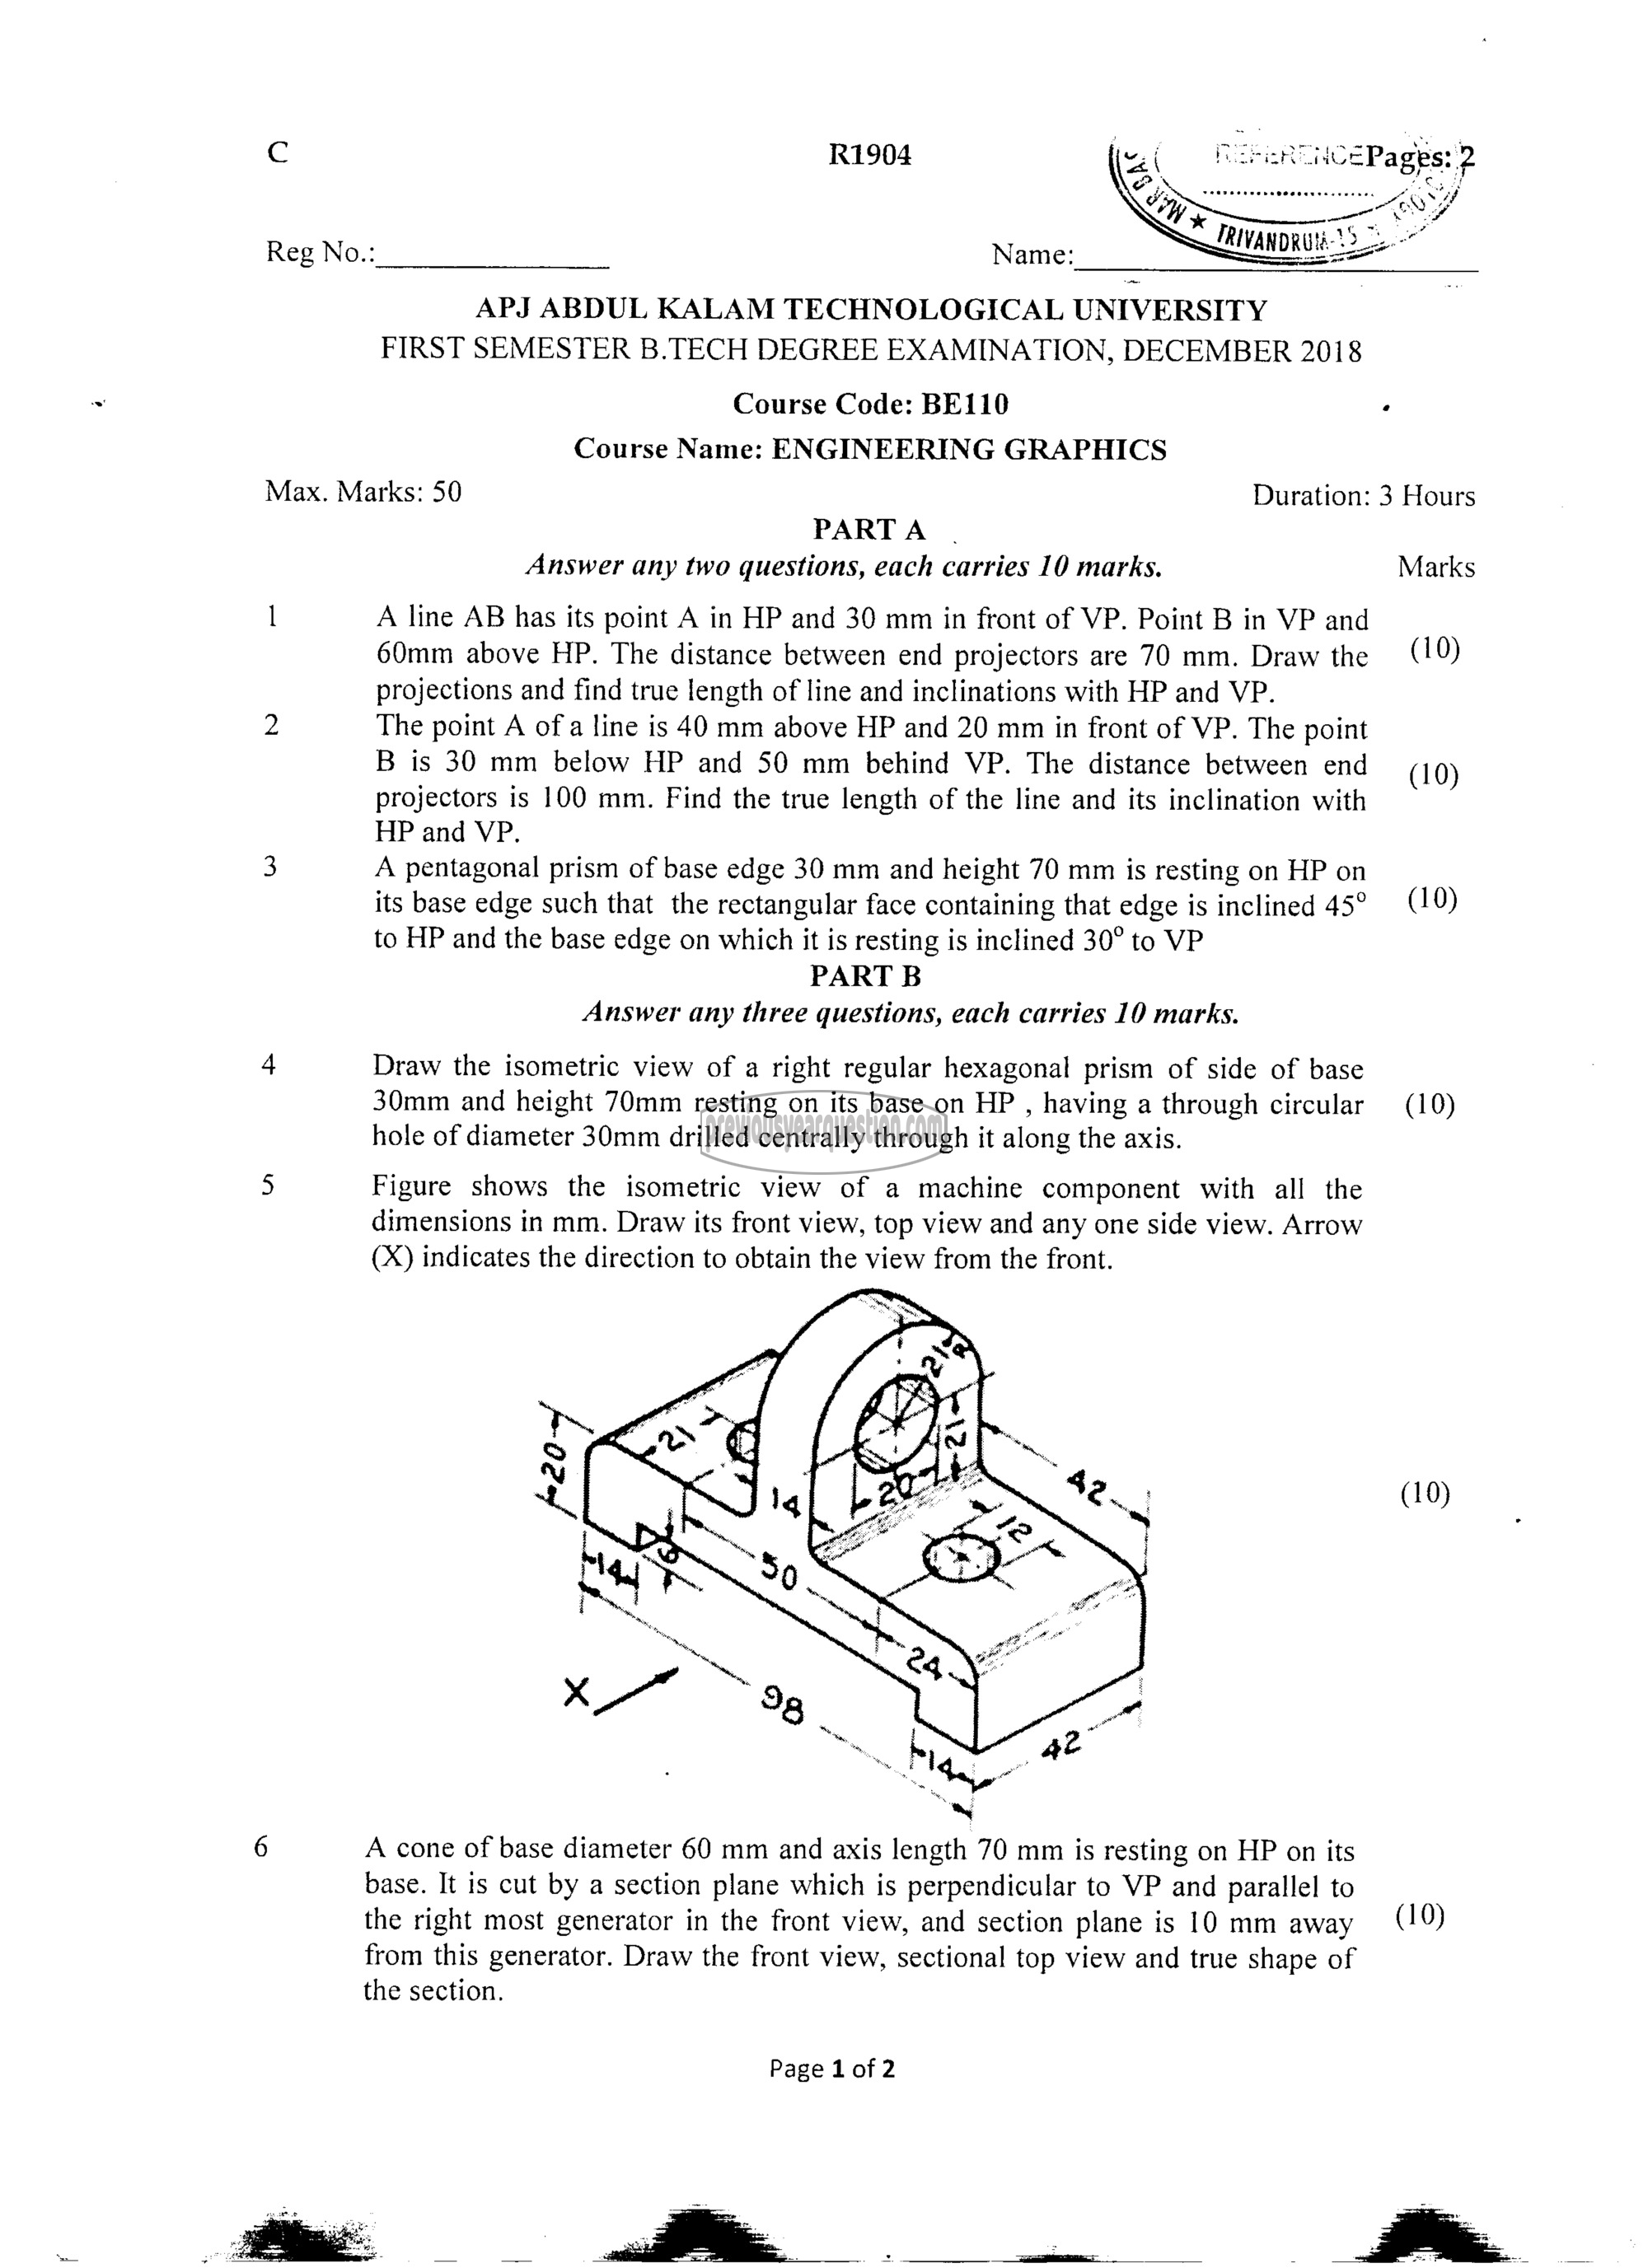
5 Figure shows the isometric view of a machine component with all the
dimensions in mm. Draw its front view, top view and any one side view. Arrow
(X) indicates the direction to obtain the view from the front.
(10)
6 A cone of base diameter 60 mm and axis length 70 mm is resting on HP on its
base. It is cut by a section plane which is perpendicular to VP and parallel to
the right most generator in the front view, and section plane is 10 mm away (10)
from this generator. Draw the front view, sectional top view and true shape of
the section.
Page 1 of 2
